Friday, September 18, 2009

What is a PDF SPam ?


What is PDF Spam?
First there was email, then came spam - unsolicited commercial email - hawking pharmaceuticals, stock trades, sex, and more. Spam filtering became smarter with keyword and bayesian filtering, and the spam was minimized for awhile. Then image spam began, the emails with little more than a link to an image on a server. When the email is opened with an HTML email reader the spam appears a few seconds after viewing the email. Since there weren't keywords to analyze, most image spam slipped through spam filters with ease. However, now spam filtering tools have added OCR capabilities to "read" an image and search for keywords and phrases just like text emails. So what's next for the spammers to try...PDF Spam.
google_protectAndRun("render_ads.js::google_render_ad", google_handleError, google_render_ad);
Spammers have now resorted to attaching PDFs to emails to entice users to open the PDFs and read their ads. Very annoying, since almost all spam including a PDF is much larger in size than a normal email. At first, I wondered if a virus writer had been able to inject a PDF file with a virus and was infecting computers. I received literally hundreds of these types of emails a few weeks ago. Luckily it does not appear that way. Although many of the newest viruses are hijacking computers and sending these PDF spams from these drone machines.


Spammers have now resorted to attaching PDFs to emails to entice users to open the PDFs and read their ads. Very annoying, since almost all spam including a PDF is much larger in size than a normal email. At first, I wondered if a virus writer had been able to inject a PDF file with a virus and was infecting computers. I received literally hundreds of these types of emails a few weeks ago. Luckily it does not appear that way. Although many of the newest viruses are hijacking computers and sending these PDF spams from these drone machines.


What Does a PDF Spam look like?
Most common PDF spam has very little in the body of the message, just a subject and the PDF file. You can see a copy of this type of spam below:


Can A PDF File Contain a Virus?
Well, yes and no. Back in 2001, a virus named Peachy was created that distributed via PDF. Fortunately, it could not be activated by someone viewing it with Acrobat Reader, only users with the full version of Adobe Acrobat were susceptible to this virus. Peachy exploited the fact that PDF files could contain executable files, in this case a VBScript file, that users
of Adobe Acrobat could actually open. Virus scanners were updated and the virus didnt have a huge effect on the internet
.
Luckily, up to this point there has not been a way for a virus writer to infect a PDF file so that a person viewing it with Adobe Reader would be harmed. Although its still best to scan ANY file including a PDF file with an up-to-date virus scanner before attempting to open it.


Can PDF Spam Be Stopped?
Although PDF Spam is a huge problem currently, spam filtering programs will catch up and start to filter this garbage email out. Unfortunately, the attachment spam will morph into other types of files, and I've already seen Excel files (.xls) being used for spam as well. Using a reliable spam filter from your ISP or business and being careful not to open ANY attachment you are not sure of will keep you the safest. Although PDF spam may not contain a virus, the best advice is to not open it and just delete it.


What About Greeting Card Spams?
A new round of electronic greeting Card
contains viruses are making the rounds as well. These ecards want you to download a file called msdataaccess.exe to view the card.


Tuesday, September 15, 2009

Remove the Shared Documents folders from My Computer

One of the most annoying things about the new Windows XP user interface is that Microsoft saw fit to provide links to all of the Shared Documents folders on your system, right at the top of the My Computer window. I can't imagine why this would be the default, even in a shared PC environment at home, but what's even more annoying is that you cannot change this behavior through the sh*ll
: Those icons are stuck there and you have to live with it.
Until now, that is.

Simply fire up the Registry Editor and navigate to the following key:
HKEY_LOCAL_MACHINE \ SOFTWARE \ Microsoft \ Windows \ CurrentVersion \ Explorer \ My Computer \ NameSpace \ DelegateFolders

You'll see a sub-key named {59031a47-3f72-44a7-89c5-5595fe6b30ee}. If you delete this, all of the Shared Documents folders (which are normally under the group called "Other Files Stored on This Computer" will be gone.

You do not need to reboot your system to see the change.


Before: A cluttered mess with icons no one will ever use (especially that orphaned one). After: Simplicity itself, and the way it should be by default.

Add a Map Drive Button to the Toolbar

Add a Map Drive Button to the Toolbar
=====================================

Do you want to quickly map a drive, but can?t find the toolbar button? If you map drives often, use one of these options to add a Map Drive button to the folder toolbar.

Option One (Long Term Fix)

Click Start, click My Computer, right-click the toolbar, then unlock the toolbars, if necessary.

Right-click the toolbar again, and then click Customize.

Under Available toolbar buttons, locate Map Drive, and drag it into the position you want on the right under Current toolbar buttons.

Click Close, click OK, and then click OK again.

You now have drive mapping buttons on your toolbar, so you can map drives from any folder window. To unmap drives, follow the above procedure, selecting Disconnect under Available toolbar buttons. To quickly map a drive, try this option.

Option Two (Quick Fix)

Click Start, and right-click My Computer.
Click Map Network Drive.

If you place your My Computer icon directly on the desktop, you can make this move in only two clicks!

Friday, September 11, 2009

Desktop Disappearing?

Although Windows 2000 is more stable than previous versions of NT, in some situations, strange things can happen. If, for example, Explorer crashes, most of your desktop, including the "Start" button, disappears. To bring back Explorer without rebooting your machine, press CONTROL-ALT-DELETE. When the "Windows Security" dialog box appears, click the "Task Manager" button. If the "Windows Task Manager' dialog box appears as it should, select the "File" menu and then "New Task (Run)". When the "Create New Task" dialog box appears, just type in "Explorer" and press the "OK" button. Windows Explorer should then reappear, complete with the "Start" button.

Hoe to change Process Priority ?

Is a particular program or process running too fast or too slow? Is a program or process taking too much of your CPU time or can you allow a process or program to take more of your computing power? To change these settings for a particular process, just right-click on an empty area of your taskbar and choose "Task Manager..." On the "Windows Task Manager" dialog box that follows, select a process and right-click it. On the popup menu that appears, select "Set Priority" and choose one of the following priorities: "Realtime", "High", "Above Normal", "Normal", "Below Normal", or "Low". The lower the priority is on the popup menu, the lower percentage of CPU time will be delegated to said priority.


Note that depending on the process and your administrative rights to your machine, you may not be able to change a particular process's priority.

How to put the Desktop in your Taskbar ?

Do you frequently multitask? If so, all of the windows created by running applications can quickly cover your desktop. If you'd like, you can make the desktop icons immediately accessible from your taskbar. Just right-click an empty area of your taskbar, choose "Toolbars", and check "Desktop". Your desktop icons will then be immediately accessible without having to minimize your current windows. If you have a lot of desktop icons, click on the two greater-than arrows (">>") to the right of your desktop icons and a popup menu will appear allowing you to select from any of the available desktop icons not immediately visible on your taskbar.

Wednesday, September 9, 2009

CSU/DSU - Connectivity in Detail

Point-to-Point Serial Links

In the network at your job, most likely the serial interfaces on your

Cisco routers are not connected to each other directly. They connect

to a CSU/DSU, which supplies a clock rate to the router, allowing the

line protocol to stay up.

In the world of Cisco exams, and in your practice lab, there are

generally routers that have directly connected serial interfaces. These

routers are connected to each other by a DCE/DTE cable; the DCE end

of the cable will connect to the router that is acting as the CSU.

What’s The Line Protocol?

You’ll see a lot of discussion in CCNA and CCNP texts, but rarely does

anyone actually say what the line protocol is. The Cisco IOS Command

Reference defines the line protocol as "indicating whether the software

processes that handle the line protocol consider the line usable (that

is, keepalives are successful) or whether it has been taken down by an

administrator."

Translation: When the line protocol is down, there’s a problem with

the keepalives or the encapsulation type.


To tell the DTE end from the DCE end before connecting it, look for a

small label wrapped around one or both of the cable ends. That label

will indicate whether that is the DCE or DTE end. If there is no label,

the connector itself may have DTE or DCE imprinted on it.

After connecting the cable to the respective routers, use show

controller to ensure the router sees the cable as a DCE or DTE.

R1#show controller serial 1

HD unit 1, idb = 0x107114, driver structure at 0x10C590

buffer size 1524 HD unit 1, V.35 DTE cable

R3#show controller serial 1

HD unit 1, idb = 0xC7D1C, driver structure at 0xCCAA0

buffer size 1524 HD unit 1, V.35 DCE cable

The routers will not be able to communicate at this point, however.

Remember that when a serial interface connects to a CSU/DSU, the

interface receives clocking from that device. There is no CSU/DSU

involved when two serial interfaces are directly connected; therefore,

one of the devices must supply a clock rate to the other. The DCE

interface must supply the clock rate to the DTE.

R3(config)#int serial 1

R3(config-if)#clockrate 56000

<>

%LINEPROTO-5-UPDOWN: Line protocol on Interface Serial1, changed state to up

R3#ping 172.12.13.1

Type escape sequence to abort.

Sending 5, 100-byte ICMP Echos to 172.12.13.1, timeout is 2 seconds:

!!!!!


In The REAL World…

For exam purposes, you need to memorize the fact that the DCE is the

interface that needs to have the clock rate configured. When you’re at

your practice rack, you’ll find out that you can’t put the clockrate on

the DTE, because the router won’t let you!


Monday, September 7, 2009

Steps to Uninstall Internet Explorer 7

How to Uninstall Internet Explorer 7

Microsoft has finally released Internet Explorer 7. It has some nice features including a revised interface, tabbed browsing, improved printing features, and a phishing filter. However, during the time between the releases of IE6 and IE7, other companies have produced browsers that have similar or better features and many customers have started using these browsers like Firefox, Opera, Avant and others.

Unfortunately instead of just offering Internet Explorer 7 as an optional download, they are pushing it to customers via the Automatic Windows Update. Which means you may wake up one day soon, after leaving your computer on, and have a brand new browser replacing Internet Explorer 6.0. This may seem fine for most people, however many people are simply resistant to much change and will find using IE7 more difficult than just using their current browser to surf the web. In these cases, you'll want to know how to uninstall Internet Explorer 7 and keep it off your computer.


Beyond the basic resistance to change issues, there have been other issues that I have experienced on several computers that make me want to wait before upgrading to Internet Explorer 7. Among these issues are conflicts with some third party applications, most noteably Norton Antivirus and Norton Internet Security. I have seen several instances of systems freezing when trying to open a browser window after installing IE7. Usually this can be fixed by simply uninstalling IE7, however on one instance even this did not correct the problem. A combination of registry cleaners and other software had to be used to correct the issues.


Uninstalling Internet Explorer 7

Follow the steps below to uninstall Internet Explorer 7

  1. Close Internet Explorer and any open windows
  2. Click on Start, click on control panel
  3. Double-click on Add/Remove Programs
  4. Find the Internet Explorer 7 program - it should appear similar to the picture below

    Uninstall Internet Explorer 7
  5. Click the Remove button and complete the removal. Your browser will revert to the last version of Internet Explorer you had installed on your computer, in most cases this will be Internet Explorer 6.0
If you cannot find Internet Explorer 7 listed in the Add/Remove Programs window, click the Show Updates checkbox at the top of the window to reveal it and then proceed with the removal.


Stopping Automatic Updates from downloading Internet Explorer 7 (IE7)

If IE7 was downloaded through the Windows Automatic Updates, you'll want to modify the updates so it doesnt download again. Follow the instructions below to do this.

  1. Open Internet Explorer and go to the following site

    http://windowsupdate.microsoft.com
  2. When the Update page opens, click on Custom
  3. Uncheck the box for Windows Internet Explorer 7.0 for windows.
  4. Check the box for Don't show this update again
  5. Check the boxes for any other updates you wish to download and install them
Now IE7 wont show in your update list and you can continue to use Internet Explorer 6, Firefox, Opera, Avant or any other browser you wish to use.


Friday, September 4, 2009

Solve Registry Problem With Ease

Click Here!

Now that you've determined that a faulty registry is the culprit of your increasingly frustrating and dysfunctional computer, what do you do next? Here's a rundown of the various things you could do to try to bring your computer back to its old self.

The first thing you'll want to try is a system restore. Here's the easiest way to do that, assuming you're running Windows 2000, 2003, XP or Vista:

First, go to Start > All Programs > Accessories > System Tools > Backup (or "System Restore" in Vista ).

Then you're going to want to choose a restore point prior to when you started experiencing registry related problems.

Follow the prompts in order to complete the restoration process. Keep your fingers crossed that this solves your problems. If your computer is still not working properly (or there were no available restore points), then you might have to try to remove the invalid registry entries yourself.

Do not do anything to your registry without making a backup first.

The next step is to actually edit your registry, which can be done manually, or automatically with a safer and simpler option like RegCure.

If you choose to do it manually,it is crucial that you are 100% sure that you know what you're doing . One small modification to your registry, if done incorrectly, can be enough to render your computer completely unable to function, and essentially useless.

And that usually means the loss of all your files, and of course, the use of your PC.

Every Windows computer has a default registry editor that can be used to manually edit your registry. (It goes without saying that if you don't know what or where that is, you probably shouldn't be tampering with your registry yourself.)

The quickest, simplest and safest thing to do is to use a registry repair program like RegCure, which automatically:

-Backs up your registry

-Scans your registry, and identifies errors

-Corrects the problems safely & properly

-Restores your PC's full functionality and improves performance

Click Here!

By,

Networksavvy


Wednesday, September 2, 2009

Driver Genius

Driver Genius Professional manage your PC to get 100% up to date Drivers and optimize PC performance. Driver Genius Professional is a powerful driver manager for Windows that can backup, restore ,search and update your drivers automatically in several mouse clicks.


Download :

http://www.4shared.com/file/129582601/ad1da820/Driver_Genius_Professional_EditionKey.html

Windows Vista: Windows Cannot Connect To The Printer. Access is Denied


One of the more interesting errors in Windows Vista happens when you try to connect to a shared network printer. Most of the time you'll receive an "Access is Denied" error when trying to connect even though you can see the printer on the network and everything else is working properly. Everything else on the network appears to work properly, shared files, internet access, etc. However, you just cannot access the ahared printer and print.The solution is to add the printer as a local printer and then try printing. Follow the directions below to accomplish Print.


1.Go into Control Panel
2.Underneath the Hardware and Sound category, click on Printer
3.Click on Add a printer from the top menu
4.Click on Add a Local Printer
5.Choose Create a New Port with type of port remaining Local Port, then click Next
6.In the Port Name box type the path to the printer you wish to connect to and Click Ok


If the computer you wish to connect to is named Bob and the printer is called HP then the path would be file://Bob/HP

7.In the Install Printer Driver screen, select your printer from the list or choose Have Disk and find the location of the printer drivers on the computer then click Next and then click Finish.
8.You should now see the printer installed in the Printers window.
9.Right-click on the printer and click Properties
10.On the General tab, click Print Test Page to test the printer.


You should now be able to printer from Windows Vista to this networked printer with any problems.

Monday, August 31, 2009

How to Speed Up Windows Boot Time


Major Windows Performance Tips


Reduce the Number of Fonts installed

Every font that is installed in Windows has to load when Windows starts. The more fonts you have installed, the slower Windows loads. Although you can safely have around 1000 fonts loaded in Windows, I like to keep my font list closer to 300-500 or fewer if possible. There are certain fonts that are definitely required by Windows, so be careful in removing any fonts from your computer unless you know they are not needed. Fonts such as Verdana,Arial,Trebuchet, Tahoma, Tahoma, Times New Roman, MS Sans Serif, and Courier New should be left on your system. Follow the directions below to remove extra fonts from Windows XP.

1) Open My Computer
2) Double-click on Drive C
3) Click on File, New Folder and title it Fonts Backup
4) Double-click on the Windows folder to open it
5) Double-click on the Fonts folder
6) Highlight the fonts you wish to remove, click on Edit and choose COPY
7) Navigate back to the C:\Fonts Backup folder and PASTE these fonts into your backup folder
8) Return to the Fonts Folder and right-click on any fonts you previously copied to the backup folder, then choose Delete.

If you accidentally removed a font, simply reverse the procedure by copying and pasting the font back into the Windows\Fonts folder.


Disk Cleanup, Scandisk, and Defrag


Performing regular hard drive maintenance on your computer every few months will not only catch problems before they cause serious damage but also make your hard drive run at its optimal level. Follow these instructions to clean up the drive and defrag it.

1) Open My Computer
2) Right-click on the hard drive usually Drive C
3) Click on the Tools tab
4) Under Error Checking, click on Check Now. Optionally, you may want to check the boxes to "Automatically Fix File Errors" and "Scan For and Attempt Recovery for Bad Sectors"
5) Next, click on the General tab and click on Disk Cleanup. After the computer calculates the amount of files to remove, place a checkmark next to the type of files you wish to remove and click Ok. Read the descriptions for each type of file to determine if you should delete it.
6) Finally, click on the Tools tab again and under Defragmentation click Defragment Now
7) Click on the hard drive you wish to defrag, click on Analyze and then click on Defragment. This process may take some time to complete.


Virus/Spyware Scans


Finally, you'll want to complete a thorough virus and spyware scan of your system. I recommend running an online virus scan first, then a check for spyware. You can click on the following links to check your system for viruses.

Online Virus Scanners

Trend Micro Housecall
BitDefender Scan Online
Ewido Online Scanner
Jotti's Online Malware Scan
Kaspersky Online Scanner
Panda Activescan
McAfee FreeScan
eTrust Antivirus Web Scanner
Symantec Security Check
Dr.Web Online Check

Trojan Scanner
TrojanScan by WindowsSecurity.com

Spyware Scanners


Lavasoft Ad-Aware SE 1.06
Spybot Search and Destroy 1.4
Microsoft Windows Defender

Using a Different Antivirus, Firewall, or AntiSpyware Program

If your computer is still running slow after changing and checking all of these options, it might be time to use a different program for antivirus, firewall, or antispyware security. A blog on the net called The PC Spy has a graph displaying the boot delay time from most of the popular products on the market including Symantec, McAfee, Trend Micro, ZoneAlarm, and more.

Not surprisingly, Symantec's Internet Security products top the list with a 40+ % boot delay, followed by Panda Antivirus, and Zone Alarm. So, while these products may help prevent infections and attacks, they also are contributing greatly to the slowdown your computer is experiencing. Avast, AVG, NOD32, and others perform much better according to this chart.

Saturday, August 29, 2009

Microsoft Outlook Program not working- How to fix it.

One of the most common errors while using Outlook 2000/2002 is the problem of Outlook not opening when you click on the icon, or it takes a long time to open (30 seconds or more). Other issues with Outlook such as Out of Memory errors, Microsoft Error reports and other oddities can also be traced to this same issue. Luckily there is a simple fix that works most of the time.

Generally the problem can be traced to a corrupted OUTCMD.DAT file in your Outlook program. Outcmd.dat stores any custom changes that you make to your toolbar buttons. If the problem is resolved after you rename this file, you must make the custom toolbar button changes again. This seems like a minor file since its supposed to only monitor changes to your toolbars, however with the amount of spyware and adware that add toolbars, change toolbars, etc. it's understandable that this file could become corrupted quite easily and cause your Outlook program not to boot.

To remove the OUTCMD.DAT file, simply search your computer for the file and delete it. When Microsoft Outlook opens again, it will recreate the file.

1.Make sure Microsoft Outlook is completely closed.
2.Click Start, click on Find or Search, and then click Files or Folders.
3.Make sure that "Look in" is set to (C:\).
4.In the "Named" or "Search for..." box, type the following filename and click dll filename and click Search or Find Now

OUTCMD.DAT

5.Delete any instances of OUTCMD.DAT and close the Search box.
6.Generally this file is found in the Application Data/Microsoft/Outlook folder
7.Reopen Microsoft Outlook and it should behave normally

Friday, August 28, 2009

Export MSN Favorites to Internet Explorer

How to Export MSN Favorites to Internet Explorer


MSN Explorer is a popular all-in-one browser and email setup for MSN.com email users. Customers that have MSN as their ISP usually install it when they are setting up their Internet access. However, its difficult to export the favorites from MSN Explorer to another browser if you decide to change ISPs or no longer use MSN Explorer.

The steps in this article will show you how to use a third-party utilities to export the favorites to Internet Explorer.


Show Hidden Files and Folders


1.Open My Computer
2.Click on Tools, Folder Options
3.Click on the View tab
4.Under the Hidden Files and Folders section, select "Show Hidden Files and Folders"
5.Uncheck the box for "Hide Protected Operating System Files (recommended)"
6.Click Ok

Find the MSN Favorites File


1.Open My Computer
2.Double-click on Drive C
3.Double-click on Documents and Settings
4.Double-click on the Logged in User folder
5.Double-click on Application Data
6.Double-click on the MSN folder (usually called MSN6 or something similar)
6.Double-click on the UserData folder
7.Double-click on the Identity folder containing a long string of characters in a pattern like this {xxxxxxxx-xxxx-xxxx-xxxx-xxxxxxxxxxx}
8.Right-click on Favorites.XML file and choose Copy
9.Return back to your Windows Desktop
10.Right-click on a blank area of the desktop and click on New, then click on Folder
11.Name the folder something like MSN Favorites
12.Open the folder you just named by double-clicking it
13.Right-click in the folder and choose Paste to copy the favorites file to this folder
14.Download the MSN Favorites Export Toolkit


Click on the following link to go to the Mainsoft Download page


http://www.mainsoft.fr/en/downloads.htm

1.Download the MSN Favorites Export Toolkit zip file to the MSN Favorites folder you 2.created on the desktop.
3.Open the MSN Favorites folder on your desktop
4.If you have Windows XP or a zip program installed, double-click on the MsnFav.zip file and unzip the files to the MSN Favorites folder. There should be 4 files contained in the zip file.


Run the MSN Favorite Export Program


1.Once you have both the Favorites.XML file and the MSN Favorites Export toolkit in the same folder, double-click on the Msnfav.vbs file to start the export process.
2.When the process is complete, there should be a new file called bookmark.htm in the folder

Import Bookmark.htm into Internet Explorer


1.Open Internet Explorer
2.Click on File
3.Click on Import and Export, then click Next
4.Click on Import Favorites and click Next
5.Select "Import from a file or address", then click Browse
6.Find the bookmarks.htm file in the MSN Favorites folder on your desktop and select it and click Save
7.Click Next after selecting the file and allow the import to begin
8.Check the list of favorites in Internet Explorer from the imported MSN favorites

How to Stop Most Computer Crashes

Computer errors and crashes are incredibly annoying and frustrating, preventing you from being able to do even the most simple of things on your PC. Problems such as crashes and errors are extremely common... but there is a solution which can stop most of them immediately.

If your computer is crashing all the time, there's likely one cause which can easily be fixed. Not many people know about this, but there's a part of your system called the 'registry' which stores all sorts of settings and information about the software and hardware of your computer. Everything from your latest emails to how much hard drive space you have left is all kept in this database, making it one of the most important and frequently used parts of Windows. Although this database is important and is a critical part of your system... it's still the biggest causes of computer errors and crashes.

The problem is that Windows *needs* to use the registry for everything on your PC. Each time you use your computer, 100's of registry files are being opened and edited to help Windows to do various tasks on your PC. This is okay, but unfortunately, Windows is constantly getting confused, leading it to save many of the files in completely the wrong way. This makes them corrupt and extremely difficult for your computer to read, slowing it down a lot. However, these damaged files also cause another problem - errors.

You see, your computer doesn't know which registry files are broken and which are okay, meaning that it will just try and read them until it can understand what they say. In most cases, this just slows your system down because it takes your PC longer to read the files, but in some cases, the registry files can be so corrupted that they will prevent your computer from being able to load them at all, causing errors or even crashes. When a computer crashes, it's simply hit a dead end which it can't recover from. This is what happens when you have registry files which your computer needs, but can't read. And because the registry database is hidden from us most of the time, hardly anyone knows about this problem.

Luckily, it's very easy to fix. You see, computer crashes are caused by registry files which are so damaged they can't be read by your computer any more. Well, there's actually a software tool which goes through the registry and fixes all the problematic files that are in there. These tools are known as 'registry cleaners' and work by scanning every registry file and then fixing any of the ones that it finds are broken. Registry cleaners are very effective at stopping computer crashes because they allow your computer to read all the files it needs, when it needs them, making it run like new again!

We've found the best registry cleaner to stop computer crashes, is a tool called Registry Fix.
Click Here for free scan!

by :James_Henry_Johnson

How to Remove Your Windows Vista Logon Password

How to Remove Your Windows Vista Logon Password

When Windows Vista first installs, it asks you for a password for your account. Then each time you log onto the computer you have to type the password in before you can access Windows Vista.

This security feature is nice to keep your information separate and private from the other users on the computer. However if you are the only user on your PC and the password prompt is annoying, you may want to consider removing the password and bypassing the logon process altogether.

Listed below you'll find the simple and quick procedure for removing your Vista password.

1) Click on Start, then Click on Control Panel

2) Click on the User Accounts and Family Safety link

NOTE: if you are in the Classic View of Control Panel, you won't see this link, continue on to step 3

3) Click on the User Accounts option

4) In the "Make changes to your user account" section, click the Remove your Password link for the user.

5) On the next screen, enter your current password

6) Click the Remove Password button to confirm that you would like to remove your account password.

7) Close the User Accounts window

8) Restart your computer and test the system.

Now that your Windows Vista user password has been removed, you will no longer need to log inot Windows Vista. Instead when your computer starts, it will now continue loading through to your desktop automatically.

After Updating or Installing Wordpress 2.8

What Error Do You Receive When Trying to Install Plugin?

I setup a new site this weekend, MyMinisiteMall.com, and decided to use Wordpress 2.8 as the front end for the site. The site consists of a bunch of minisites so I needed a way to connect them all together on the home page of the site. Wordpress seemed like the logical choice for this sort of thing.

So I used the Fantastico control panel to install the latest version of Wordpress 2.8. Everything went smooth and in a few minutes the blog was installed.

Then I proceed to customize the settings in Wordpress 2.8 and proceeded to install a plugin or two. One of the first plugins I always install is the All in One SEO Pack. I went into the plugins section, choose Add New, and found the plugin. When I clicked on Install the following error message appeared:

"Incompatible archive PCLZIP_ERR_BAD_FORMAT (-10) : Invalid archive structure"


Thinking that this was a problem with this plugin, I found 3 more to install and was greeted by the same or a similar message each time I tried to install them. There appeared to be a problem with the installation of Wordpress 2.8. In fact, after some research I discovered the problem was with a file called http.php.

Steps to Correct Plugin Upload Problem in Wordpress 2.8

Follow the steps below to fix the problem with not being able to install plugins.

1) Download the following file to your desktop. Just right-click on the link below and choose Save As to save to your desktop


New Version of http.php for Wordpress 2.8

click on this link and download :-

http://core.trac.wordpress.org/export/11450/trunk/wp-includes/http.php


2) Once the file has been saved, open your FTP program and log into your site

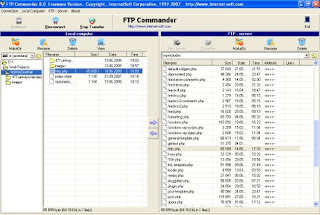
3) Transfer the file http.php into your WP-Includes subdirectory in Wordpress. I used a free ftp program called FTP Commander to transfer the file into the wp-includes subdirectory. Then I closed the FTP program


4) Now log back into your Wordpress Control Panel and try to install a new plugin. This simple fix worked for me.

NOTE: Not all Wordpress 2.8 installations are experiencing this problem, however for the ones that do have an issue, this fix worked and the ability to download and install plugins was restored